
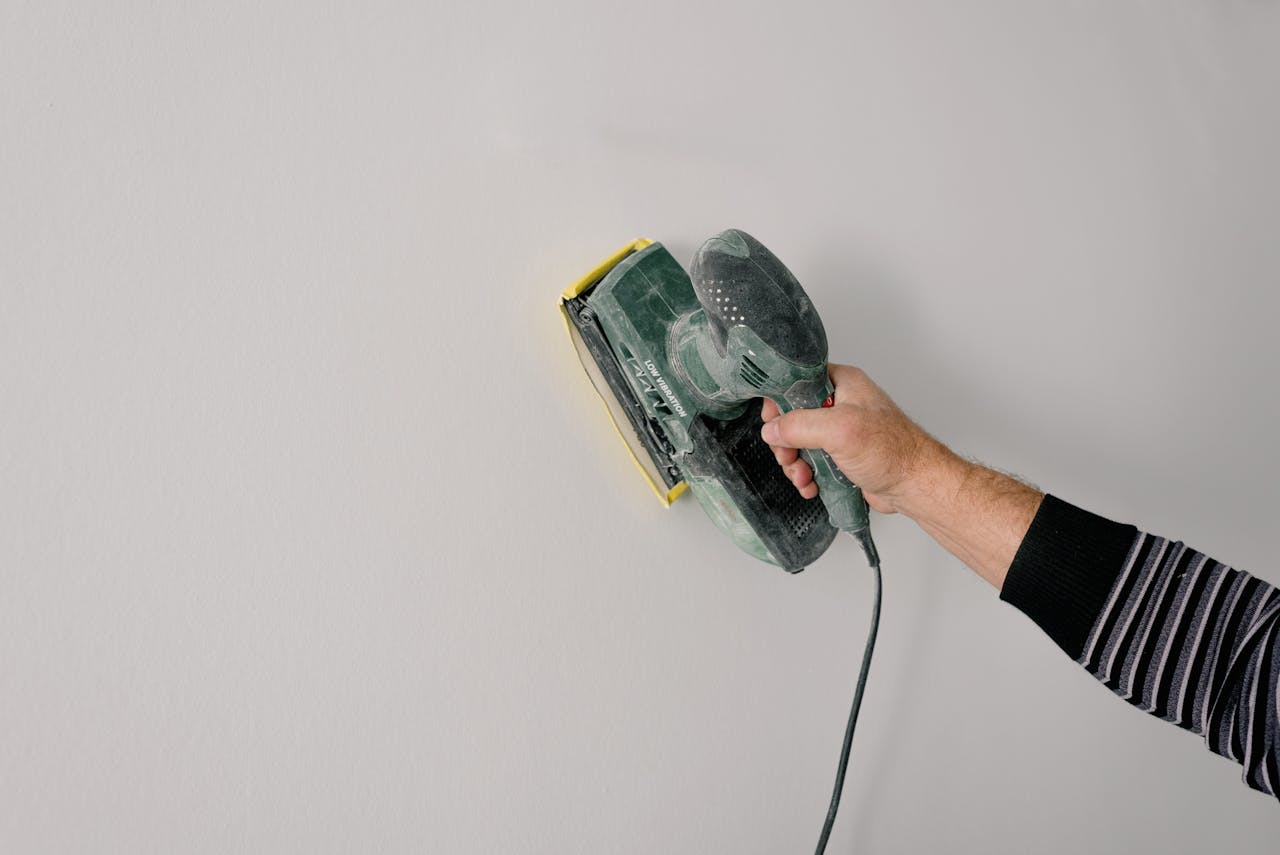
Best Way to Sand Drywall: A Practical, Beginner-Friendly Guide
Sanding drywall is one of those home improvement tasks that looks simple at first glance, then quickly turns into a dusty, frustrating mess if we’re not prepared. Many of us have been there. We patch a hole, fix a seam, let the compound dry… and then stand in front of the wall wondering how to make it smooth without destroying the room or our patience.
The good news is this: drywall sanding doesn’t have to be complicated, intimidating, or perfect to be effective. With the right approach, a bit of patience, and some realistic expectations, we can get clean, smooth walls that are ready for paint — even as beginners.
In this guide, we’ll walk through the best way to sand drywall, step by step. We’ll explain what’s really happening during sanding, clear up common misconceptions, point out typical mistakes, and share practical tips that actually work in real homes, not just in ideal workshop conditions.
Why Drywall Sanding Matters More Than We Think
Drywall sanding isn’t about grinding the wall flat. It’s about blending. We’re trying to make repaired areas disappear so the wall looks even once painted.
Joint compound dries harder than many expect, but it’s still softer than the drywall paper underneath. That means aggressive sanding can quickly cause damage if we’re not careful. On the other hand, too little sanding leaves ridges, lines, and visible patches that stand out even more after painting.
The goal is balance:
-
Smooth transitions
-
No sharp edges
-
No visible seams
-
No exposed drywall paper
Once we understand that, sanding becomes much less stressful.
Understanding the Basics Before We Start
What Are We Actually Sanding?
We’re sanding dried joint compound, not the drywall itself. That distinction matters. Drywall paper is fragile, and once it’s damaged, fixing it takes extra steps.
Dry joint compound sands easily, especially when it’s fully cured. If it gums up the sandpaper, it’s not ready yet.
Rule of thumb:
If sanding feels sticky or drags instead of producing fine dust, wait longer.
The Best Way to Sand Drywall (Step by Step)
1. Let the Compound Fully Dry
This sounds obvious, but it’s one of the most common mistakes. Drying time depends on:
-
Thickness of the compound
-
Room temperature
-
Humidity
-
Air circulation
Rushing this step leads to uneven surfaces and frustration.
2. Start With the Right Grit
For most drywall sanding, medium-fine grit works best. Too coarse and we’ll dig grooves. Too fine and we’ll waste time without real results.
We’re shaping first, refining later.
3. Use Light Pressure — Always
This is where many beginners go wrong.
Drywall sanding is not about force. It’s about control. Let the abrasive do the work. Light, even strokes give far better results than pressing hard.
If we feel the need to push, something else is wrong — usually the compound isn’t dry or the grit is incorrect.
4. Sand in Broad, Gentle Strokes
Short, aggressive movements create uneven patches. Instead:
-
Use long strokes
-
Move in multiple directions
-
Feather the edges outward
We’re blending the repair into the surrounding wall, not focusing only on the patched area.
5. Check Progress With Our Hands, Not Just Our Eyes
Walls can look smooth and still feel uneven.
Close our eyes and run a hand across the surface. Our fingers are excellent at detecting subtle ridges that paint will highlight later.
6. Stop Sooner Than We Think
Over-sanding is far more common than under-sanding.
If it feels mostly smooth, it probably is. Primer and paint hide minor imperfections much better than most people expect.

Hand Sanding vs. Pole Sanding
Hand Sanding
Best for:
-
Small patches
-
Corners
-
Tight spaces
-
Detail work
Hand sanding gives us control and precision, especially around edges and repairs.
Pole Sanding
Best for:
-
Large wall areas
-
Ceilings
-
Feathering wide seams
Pole sanders help keep pressure even and reduce strain, but they can remove material faster than intended if we’re not careful.
For most DIY projects, a combination of both works best.
Dust Control: The Part Everyone Hates
Drywall dust is fine, light, and travels everywhere. While we can’t eliminate it completely, we can reduce it a lot.
Simple Dust Control Tips
-
Close doors and vents
-
Lay down floor protection
-
Use a vacuum attachment if available
-
Clean frequently instead of waiting until the end
Wearing basic protective gear isn’t overkill. Drywall dust irritates eyes, lungs, and skin more than most people expect.

Common Drywall Sanding Mistakes (And How to Avoid Them)
1. Sanding Too Aggressively
This often leads to:
-
Exposed drywall paper
-
Uneven depressions
-
Extra repair work
Fix: Slow down and lighten pressure.
2. Using the Wrong Grit
Very coarse abrasives remove material too quickly and leave scratches that show through paint.
Fix: Stick to medium or fine grits for most work.
3. Focusing Only on the Patch
If we sand only the repaired spot, it will still be visible after painting.
Fix: Always feather outward into the surrounding wall.
4. Ignoring Edges and Corners
Sharp edges catch light and reveal repairs.
Fix: Lightly soften edges instead of flattening them.
5. Expecting Perfection
Drywall finishing is about “good enough,” not flawless.
Fix: Remember that paint and lighting play a huge role in the final look.
Helpful Practical Tips From Real-Life DIY Projects
-
Use Light at an Angle
Shining a light along the wall reveals imperfections that overhead lighting hides. This simple trick saves a lot of rework later.
Clean Between Sanding Passes
Dust hides low spots and scratches. Wipe the wall before deciding whether you’re done.
Multiple Thin Coats Beat One Thick One
If sanding feels difficult, the compound layer was probably too thick.
Thin layers dry faster, sand easier, and look better.
Don’t Chase Every Tiny Mark
Walls are rarely perfect, especially in older homes. Minor imperfections disappear once furniture, décor, and normal lighting are in place.

Drywall Sanding Myths Worth Letting Go
“More Sanding Means Better Results”
Not true. Controlled sanding matters far more than time spent.
“If I See Paper, It’s Ruined”
Exposed paper isn’t ideal, but it’s fixable. It just adds an extra step.
“Professionals Get Perfect Walls Every Time”
Even pros rely on lighting, paint, and perspective. Perfection isn’t the goal — consistency is.
When Are We Actually Done Sanding?
We’re done when:
-
The surface feels smooth to the touch
-
No sharp edges are visible
-
Repairs blend naturally into the wall
-
Nothing jumps out under angled light
If those boxes are checked, it’s time to stop.
Conclusion
Quick Summary: Best Way to Sand Drywall
-
Let joint compound dry completely
-
Use medium to fine grit abrasives
-
Apply light, even pressure
-
Sand in broad, feathered strokes
-
Check progress by feel, not just sight
-
Avoid over-sanding
-
Control dust as much as possible
-
Accept that “smooth” beats “perfect”
Drywall sanding is one of those skills that improves quickly with a little experience. The first wall might feel awkward. The second will feel easier. By the third, we usually wonder why it ever felt intimidating in the first place.
With patience and the right approach, smooth, paint-ready walls are absolutely within reach — even for DIY beginners.
