
How to Sand Furniture Without a Sander (And Still Get Smooth Results)
Not everyone has a power sander sitting in the garage.
And honestly, for many small furniture projects, we don’t always need one.
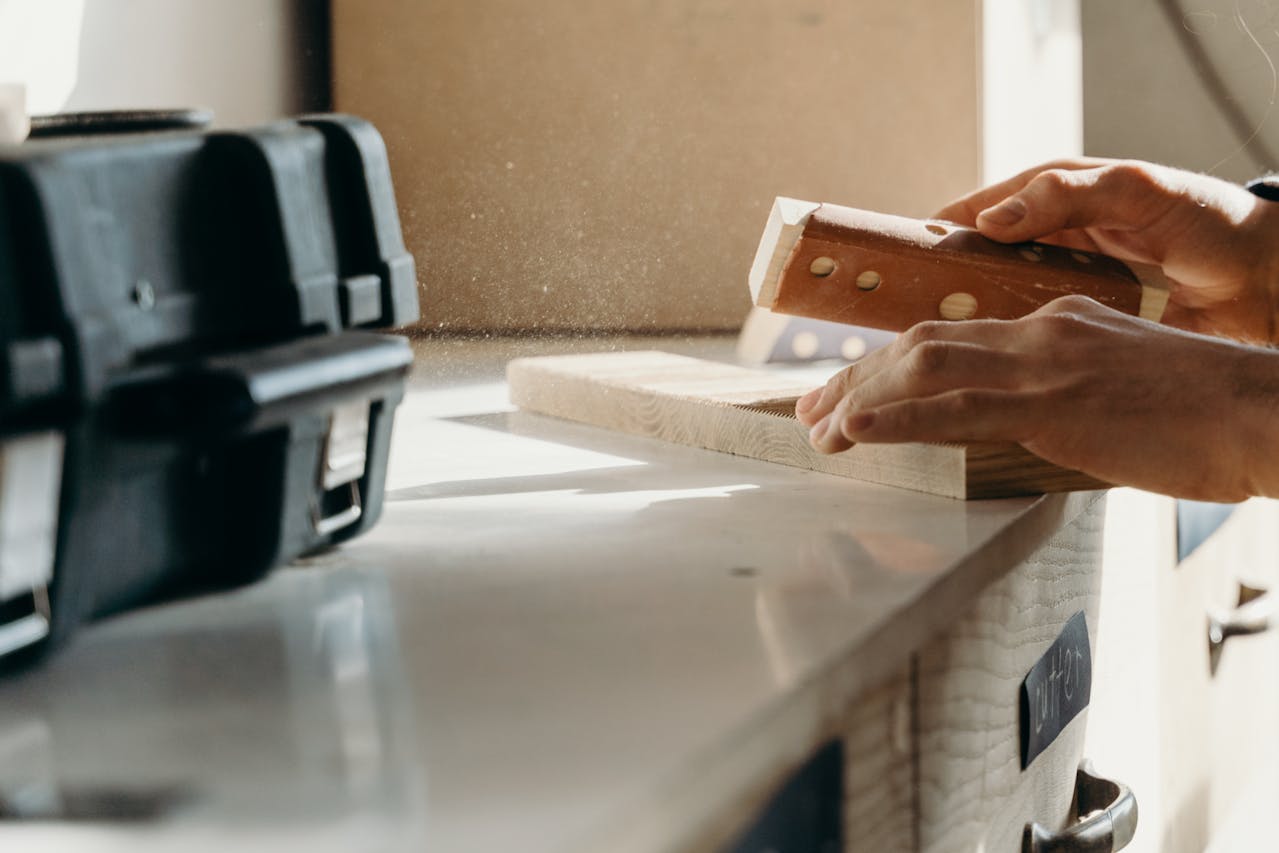
Whether we’re restoring an old chair, repainting a table, or smoothing rough wood edges, it’s completely possible to sand furniture by hand and still achieve great results. In fact, hand sanding sometimes gives us more control than power tools — especially on delicate surfaces or detailed pieces.
The key is understanding the right technique, choosing the proper sanding materials, and knowing where most beginners go wrong.
Let’s walk through how to sand furniture without a sander and still get clean, smooth, professional-looking results.
Why Hand Sanding Still Works
Power sanders are faster, but faster isn’t always better.
Hand sanding gives us:
- More control over pressure
- Better precision around corners and curves
- Less risk of over-sanding
- Better feel for the surface texture
For furniture with decorative details, thin veneers, or rounded edges, hand sanding can actually be the safer option.
It just requires a little patience.
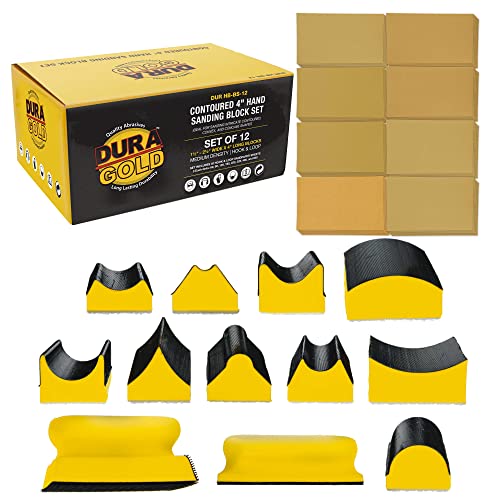
- Dura-Gold Pro Series 12-Piece Contoured Profile Hook & Loop Hand Sanding Block Set with 40 Sheets of Assorted Sandpaper Grits. Uniquely designed rectangle sanding blocks that are ideal for sanding intricate contoured, convex, and concave surface shapes. These hook & loop sanding blocks are constructed with medium-density durable polyurethane foam, measure from 1-1/2" to 2-1/2" wide, and are 4" long. Amazing sanding blocks that help you finish difficult jobs quickly, saving you time and money!
- It includes a 40-sheet grit variety pack of sanding block-sized Dura-Gold 4" x 2-3/4" gold sandpaper sheets with a hook & loop backing. 5 Sheets each of 8 different sanding grits: 60, 80,120,180, 220, 320, 400, and 600. Superior quality sanding sheets made with super-coated aluminum oxide corundum fused with zirconia alumina. These coarse-cut to fine-cut sandpaper sheets are ideal for aggressive sanding to extra-fine-finish sanding on all types of surfaces.
- This huge, unique profile variety of contoured, convex, and concave block shapes provides nearly every contour shape needed to sand difficult molding edges on wood, woodworking furniture, metal, automotive autobody paint refinishing, car body line contours, metalworking shops, industrial shops, drywalling, fiberglass, plastics, household crown moldings, baseboards, craft projects, or any odd surface shape that needs to be sanded.
What We Need for Hand Sanding
The good news is that the tool list is simple.
Helpful supplies include:
- Sandpaper in multiple grits
- A sanding block or foam block
- A clean cloth or tack cloth
- Safety glasses
- Dust mask for heavier sanding
The sanding block matters more than many people realize. It helps distribute pressure evenly and prevents uneven surfaces.
Understanding Sandpaper Grit
One of the biggest mistakes beginners make is using the wrong grit.
Here’s a simple breakdown:
Coarse Grit (40–80)
Used for:
- Removing paint
- Heavy material removal
- Rough surfaces
Too aggressive for finishing work.
Medium Grit (100–150)
Good for:
- General smoothing
- Preparing furniture for paint
- Removing light imperfections
This is the most commonly used range for furniture projects.
Fine Grit (180–220+)
Best for:
- Final smoothing
- Pre-paint preparation
- Finishing between coats
Fine grit creates a much smoother surface.

Step-by-Step: Sanding Furniture by Hand
1. Clean the Furniture First
Dust, grease, and dirt can clog sandpaper quickly.
Wipe the surface thoroughly before sanding.
2. Start With the Right Grit
Don’t automatically start with the roughest paper.
If the furniture is already fairly smooth, medium grit is usually enough.
Aggressive sanding removes material quickly and can damage details.
3. Sand With the Grain
Always sand in the direction of the wood grain whenever possible.
Sanding across the grain leaves visible scratches that become very noticeable after staining or painting.
4. Apply Even Pressure
Pressing harder doesn’t make sanding better.
In fact, uneven pressure often creates:
- Low spots
- Rounded edges
- Uneven surfaces
Let the sandpaper do the work.
5. Progress Gradually to Finer Grits
Once the surface feels smoother, switch to a finer grit.
Each grit removes scratches left by the previous one.
Skipping directly from rough grit to ultra-fine grit usually leaves visible sanding marks behind.

How to Sand Curved or Detailed Furniture
This is where hand sanding really shines.
For curved edges or carved details, we can use:
- Flexible foam sanding pads
- Folded sandpaper
- Small sanding sponges
These conform to the shape of the furniture much better than rigid power sanders.
Common Mistakes to Avoid
Hand sanding seems simple, but a few mistakes can ruin the finish.
Sanding Too Aggressively
Removing too much material too quickly can damage veneers or soften sharp edges.
Using Only One Grit
Furniture usually needs multiple sanding stages for a smooth finish.
Ignoring Dust Between Steps
Dust left on the surface can create scratches during finer sanding.
Rushing the Final Sanding
The last sanding stage often determines how professional the final finish looks.

What About Painted Furniture?
If we’re repainting furniture, we don’t always need to strip everything down to bare wood.
Sometimes a light sanding is enough to:
- Remove gloss
- Improve paint adhesion
- Smooth imperfections
That saves a lot of time and effort.
Helpful Tips for Better Results
A few small habits make hand sanding much easier.
- Change sandpaper when it clogs
- Use good lighting to spot scratches
- Run your hand across the surface often
- Vacuum dust between sanding stages
Touch is often more reliable than sight when checking smoothness.

Is Hand Sanding Slower?
Yes — but not always in a bad way.
Hand sanding forces us to slow down and pay attention to the surface. That often leads to cleaner, more careful work.
For small furniture projects, the difference in time may not even be significant.
Conclusion
Quick Summary: How to Sand Furniture Without a Sander
- Use multiple sandpaper grits.
- Sand with the wood grain.
- Apply even pressure.
- Progress gradually to finer grits.
- Clean dust between sanding stages.
- Use foam pads for curves and details.
- Don’t rush the final smoothing step.
Sanding furniture without a power sander may sound old-fashioned, but it still works extremely well.
With patience, proper technique, and the right grit sequence, we can create smooth, professional-looking surfaces using nothing more than sandpaper and steady hands.


