
Best Way to Sand Ceiling Drywall (Without Making a Huge Mess)
Sanding drywall on a ceiling is one of those tasks most of us don’t look forward to.
It’s dusty. It’s overhead. It’s physically tiring. And if we rush it, the final result shows every mistake once the paint goes on.
But here’s the good news: there is a right way to sand ceiling drywall that makes the job cleaner, easier, and far more professional-looking.
Let’s walk through how to do it properly, what tools actually help, and how to avoid turning the whole room into a dust cloud.
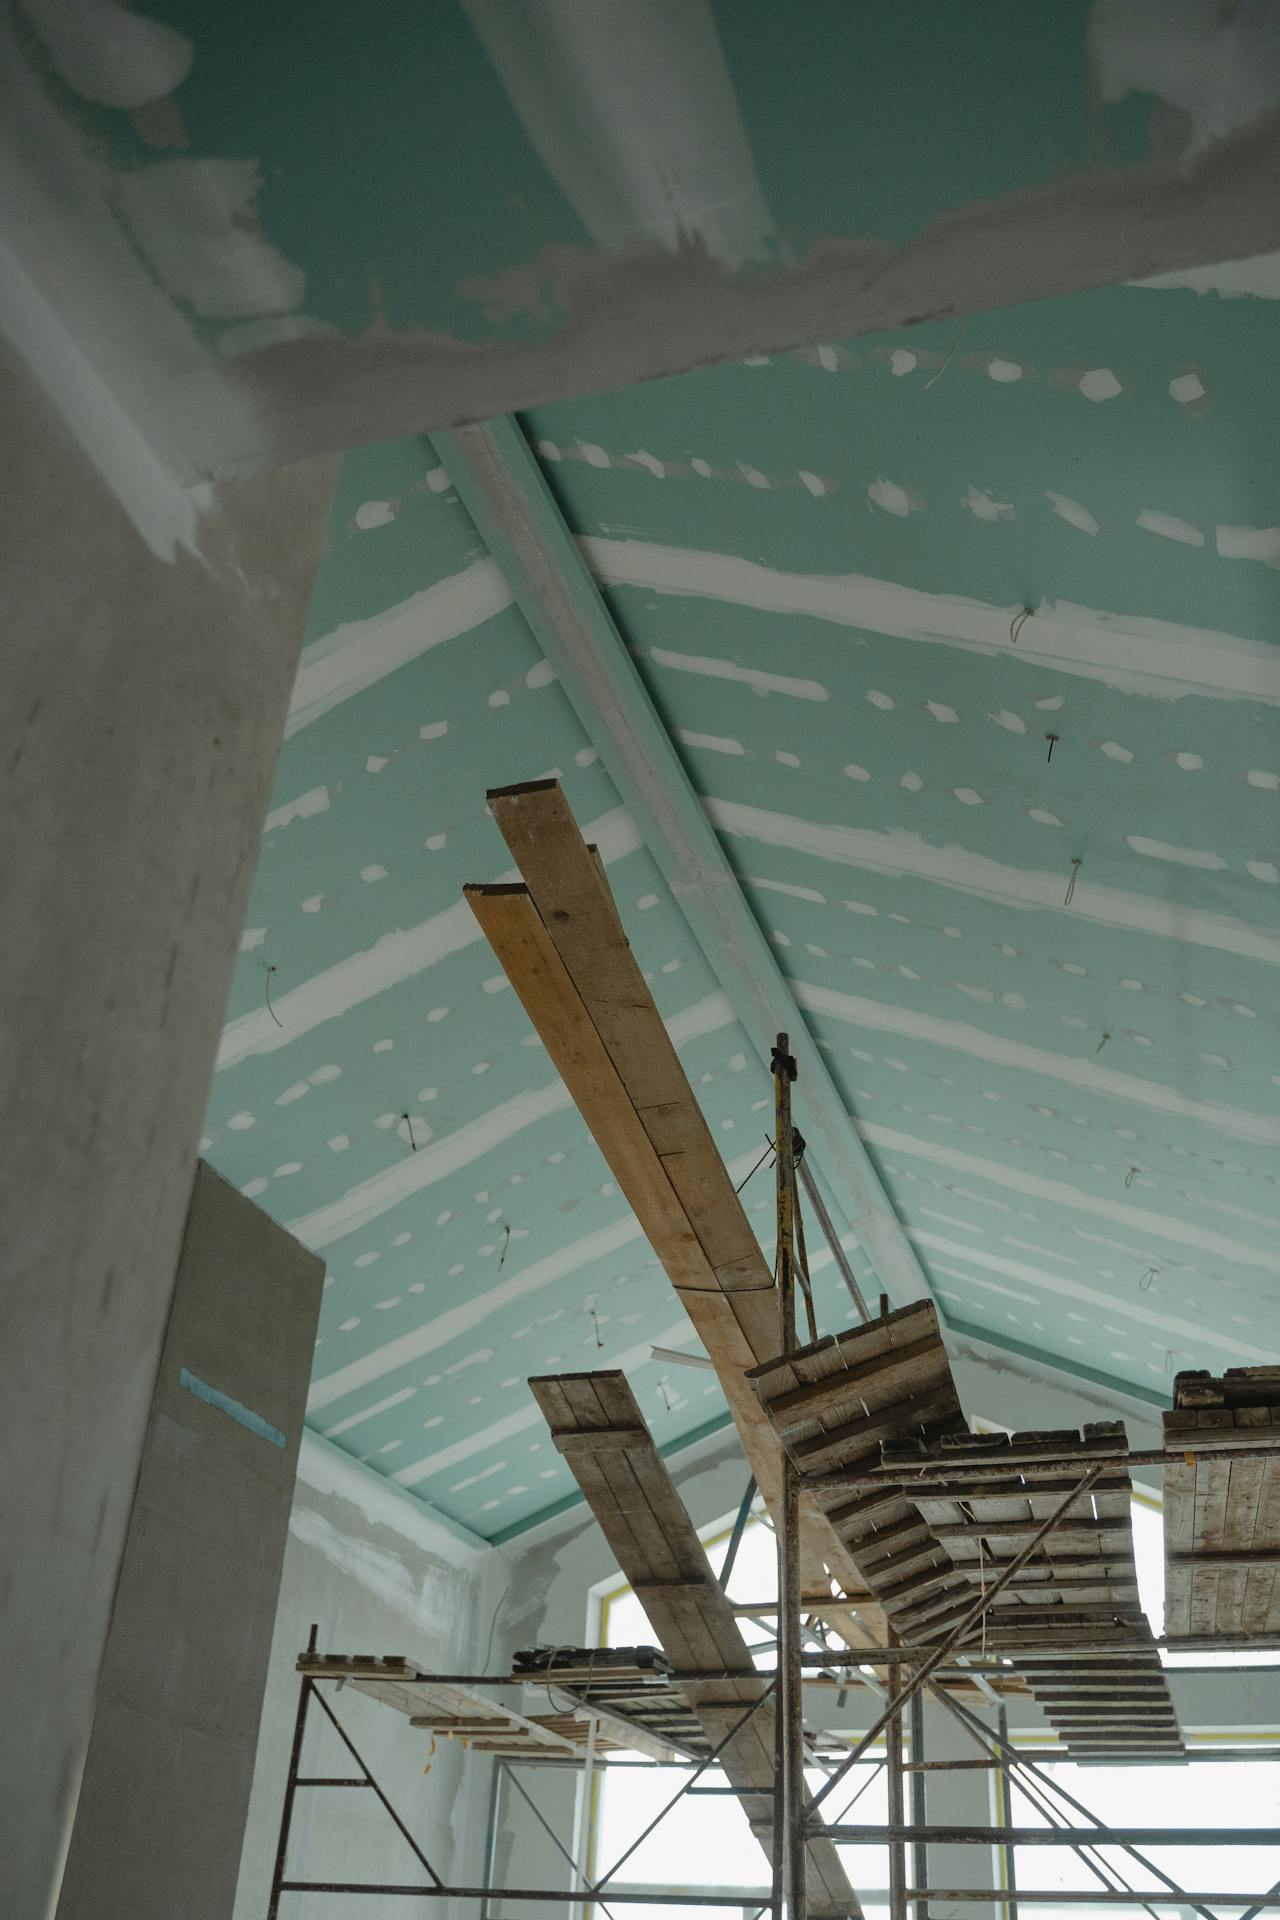
Why Ceiling Drywall Is Trickier Than Walls
Ceilings add a few extra challenges compared to sanding walls:
- We’re working overhead (which is more tiring)
- Dust falls directly down onto us
- It’s harder to see imperfections
- Uneven sanding becomes more noticeable under lighting
Because of this, control and lighting matter even more when sanding ceilings.
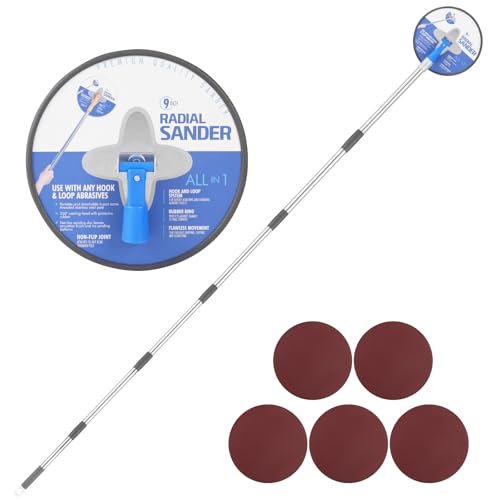
- 【Excellent and Efficient Sanding】: Our 9-inch round sanding head can quickly cover large areas, with an 86-inch adjustable extension pole, providing an efficient solution for preparing walls and ceilings.
- 【 Multi-Directional Swivel Head】: The 360-degree rotating head offers unparalleled flexibility, allowing you to sand in any direction with ease. This ensures a smooth and even finish in every corner and edge of your project.
- 【 Convenient Sandpaper Replacement System】: The quick-change sandpaper system allows for fast and easy sandpaper swaps without any tools, ensuring your work remains uninterrupted and flows smoothly.
The Tools That Make the Biggest Difference
We don’t need complicated tools, but the right ones make the job much easier.
Helpful tools include:
- A pole sander (for reaching ceilings comfortably)
- Sanding screens or sanding paper (medium to fine grit)
- A sanding sponge for corners and edges
- A dust mask or respirator
- Safety glasses
A pole sander is especially useful because it lets us work without constantly reaching overhead.
Choosing the Right Sandpaper Grit
Using the wrong grit is a common mistake.
For drywall, we typically want:
- 120–150 grit for general sanding
- 180–220 grit for finishing touches
Too coarse, and we risk damaging the joint compound. Too fine, and we’ll spend forever trying to smooth imperfections.
Step-by-Step: Sanding Ceiling Drywall Properly
1. Let the Compound Fully Dry
This step is often rushed.
If the joint compound isn’t completely dry, sanding becomes messy and uneven. Always wait until it’s fully hardened.
2. Set Up Lighting
Good lighting is critical.
Use a work light placed at an angle across the ceiling. This creates shadows that reveal:
- High spots
- Ridges
- Uneven areas
Without proper lighting, it’s easy to miss imperfections.
3. Start With Light Pressure
This is where many people go wrong.
We should:
- Use light, even pressure
- Move in wide, smooth strokes
- Let the sandpaper do the work
Pressing too hard can gouge the surface and create more work.
4. Focus on Seams and Joints
Most sanding is needed where:
- Drywall sheets meet
- Screws are covered
- Joint compound was applied
We don’t need to sand the entire ceiling — just the areas that were finished.
5. Check Frequently
Stop often and inspect the surface.
Running a hand lightly across the area can help detect imperfections that aren’t visible.

How to Control Dust (This Matters More Than You Think)
Drywall dust spreads everywhere if we’re not careful.
To reduce mess:
- Seal off the room with plastic sheeting
- Cover floors and furniture
- Use a vacuum-compatible sanding tool if available
- Wear proper respiratory protection
Even with precautions, some dust is unavoidable — but we can reduce it significantly.
Common Mistakes to Avoid
Let’s avoid the most frustrating issues.
Sanding Too Aggressively
This can remove too much compound and expose the tape underneath.
Skipping Proper Lighting
Without angled light, we miss flaws that show up later after painting.
Using the Wrong Grit
Too coarse creates scratches. Too fine slows progress.
Not Wearing Protection
Drywall dust is very fine and can irritate lungs and eyes.

A Simple Trick for Better Results
One helpful approach is to sand in a circular or crosshatch pattern instead of straight lines.
This helps blend edges more smoothly and reduces visible sanding marks.
It’s a small adjustment that can make a noticeable difference in the final finish.
Is Wet Sanding a Good Option?
In some cases, yes.
Wet sanding uses a damp sponge instead of sandpaper. It:
- Produces less dust
- Works well for small touch-ups
However, it’s slower and less effective for larger areas. For full ceilings, dry sanding is usually more practical.
When to Stop Sanding
This is important.
We don’t need a perfectly polished surface — just a smooth, even transition.
If we keep sanding too long, we risk damaging the finish.
A good rule:
If it looks smooth under angled light and feels even to the touch, it’s ready.

How to Spot Imperfections Before You Start Painting
One of the most frustrating situations is finishing sanding, painting the ceiling… and only then noticing every small imperfection.
The truth is, paint makes flaws more visible — not less.
Before moving on to painting, we should take a few extra minutes to check the surface properly.
Here’s what helps:
- Shine a bright light at an angle across the ceiling
- Look for shadows, ridges, or uneven patches
- Run your hand lightly over the surface to feel subtle bumps
- Check from different positions in the room
If something looks slightly uneven now, it will be much more noticeable after painting — especially with flat lighting or daylight.
Fixing small imperfections at this stage is quick and easy. Fixing them after painting usually means going back, sanding again, and repainting.
Taking this extra step saves time, effort, and frustration.
Conclusion
Best Way to Sand Ceiling Drywall…
- Use a pole sander for better reach and control.
- Choose 120–150 grit, then finish with finer grit.
- Sand lightly — don’t press hard.
- Use angled lighting to spot imperfections.
- Control dust with coverings and protective gear.
- Focus on seams, not the entire ceiling.
- Stop once the surface feels smooth and even.
Sanding ceiling drywall may not be the most enjoyable part of a project, but it’s one of the most important for achieving a clean final result.
With the right approach, a bit of patience, and proper setup, we can turn a rough ceiling into a smooth, paint-ready surface — without covering the entire house in dust.
