
How to Sand Wood Properly – A Practical Guide for DIY Beginners
If we’ve ever tried to paint, stain, or refinish wood and felt disappointed by the final result, chances are the problem started much earlier — during sanding. Sanding wood properly isn’t glamorous, and it’s rarely anyone’s favorite part of a DIY project. Still, it’s one of those steps that quietly decides whether the end result looks smooth and professional or rough and uneven.
The good news? Sanding isn’t complicated, technical, or reserved for professionals. With a bit of patience, the right approach, and a clear understanding of what we’re trying to achieve, anyone can learn how to sand wood properly — even if we’re complete beginners.
In this guide, we’ll walk through the basics step by step. We’ll clear up common misunderstandings, talk about typical mistakes, and share practical tips that actually make sanding easier and more effective.
Why Proper Sanding Matters More Than We Think
Sanding isn’t just about making wood “feel smooth.” What we’re really doing is preparing the surface so everything that comes after — paint, stain, oil, or varnish — can properly stick and look even.
When sanding is done well:
-
Finishes go on more evenly
-
Colors look richer and more consistent
-
The surface feels smooth to the touch
-
The final result lasts longer
When sanding is rushed or skipped, small flaws tend to stand out even more once the finish is applied. Scratches, dents, and rough patches suddenly become impossible to ignore.

Understanding Wood and Sanding Basics
Before picking up sandpaper, it helps to understand what we’re working with.
Wood is a natural material with a visible grain pattern. That grain runs in one main direction, and sanding interacts with it directly. Sanding with the grain smooths the surface. Sanding against it can leave scratches that show up later, no matter how careful we are.
Another important concept is grit size. Sandpaper comes in different grit levels, and each one serves a specific purpose.
What Sandpaper Grit Really Means
-
Low grit (rough) removes material quickly
-
Medium grit smooths and evens things out
-
High grit (fine) refines the surface
Sanding properly is usually a process, not a one-step action. We move from rougher grits to finer ones gradually, instead of jumping straight to the smoothest option.
Tools We Can Use for Sanding
We don’t need a fully equipped workshop to sand wood correctly. Most projects can be handled with a few basic tools.
-
Sandpaper sheets or rolls
-
Sanding sponges (great for curves and edges)
-
Sanding block for even pressure
-
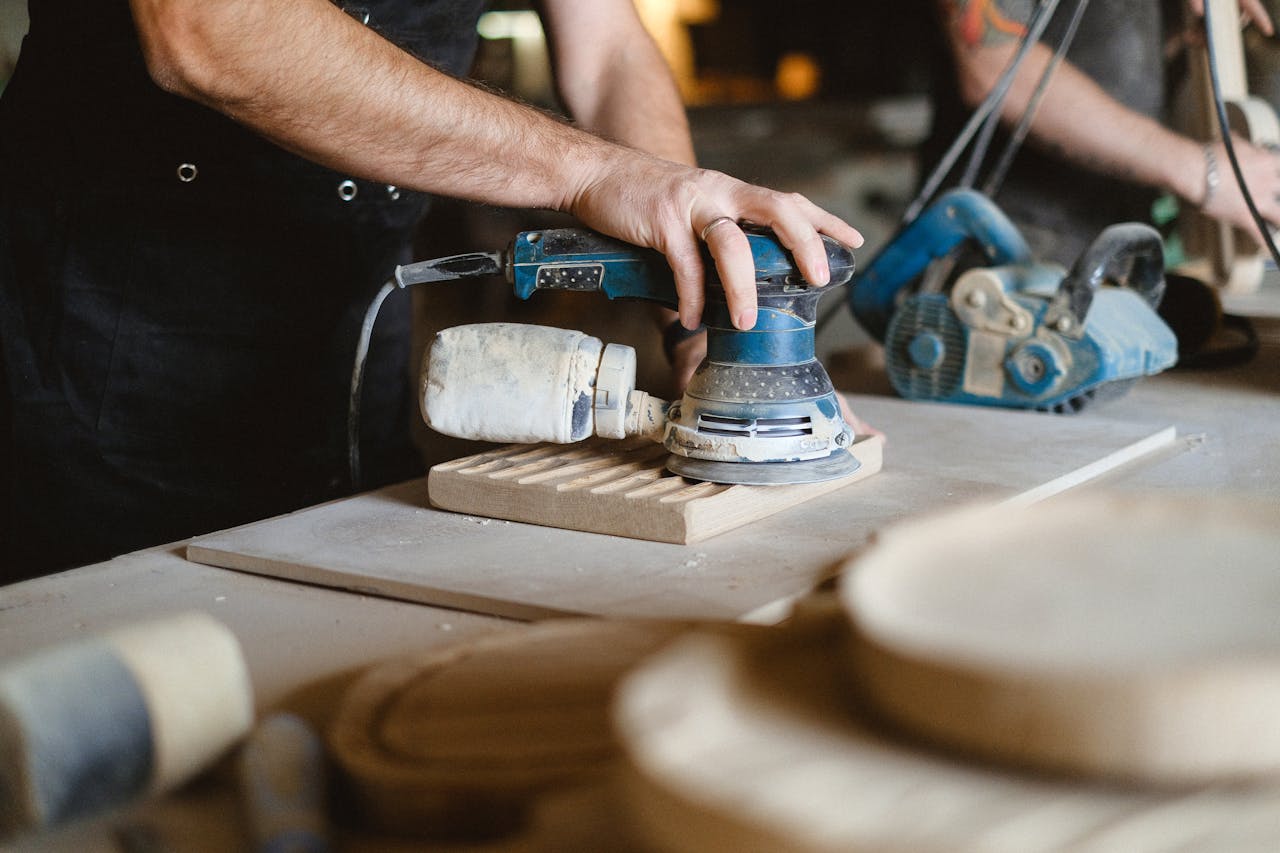
Power sander for larger flat surfaces
-
Vacuum or brush for dust removal
For beginners, hand sanding is often easier to control. Power sanders save time, but they also make it easier to remove too much material if we’re not careful.

The Right Way to Sand Wood Step by Step
Step 1: Start With the Right Grit
Always begin with the grit that matches the condition of the wood.
-
Rough, damaged, or previously painted surfaces need a coarser grit
-
New or lightly used wood usually needs medium grit to start
Starting too fine is a common mistake. Fine sandpaper won’t remove imperfections — it will only polish over them.
Step 2: Sand With the Grain
This rule matters more than almost anything else.
We always sand in the direction of the wood grain, not across it. Long, even strokes work better than short, aggressive motions. Let the sandpaper do the work instead of forcing it.
Step 3: Apply Light, Even Pressure
Pressing harder doesn’t make sanding faster — it just creates uneven spots.
A steady, moderate pressure:
-
Keeps the surface flat
-
Prevents deep scratches
-
Reduces hand fatigue
If we’re using a power sander, guiding it gently is usually enough.
Step 4: Move Gradually to Finer Grits
Once the surface looks even, we switch to a finer grit and repeat the process. Each grit removes the scratches left by the previous one.
Skipping grit levels often leaves visible sanding marks that show up later.
Step 5: Clean the Surface Between Grits
Dust hides imperfections.
Before moving to the next grit:
-
Brush off dust
-
Wipe the surface clean
-
Check for missed spots
This small habit makes a big difference.

Common Sanding Mistakes We Should Avoid
Even careful DIYers fall into these traps. The key is knowing what to watch out for.
Skipping Grits
Jumping from very rough to very fine sandpaper saves time upfront but costs us later. Scratches from coarse grit don’t magically disappear.
Sanding Against the Grain
It may feel faster, but it almost always leaves visible marks. These scratches become especially obvious after staining.
Using Worn-Out Sandpaper
Dull sandpaper:
-
Takes longer
-
Heats up the wood
-
Leaves uneven results
If sanding feels frustrating, the sandpaper is probably past its prime.
Ignoring Edges and Corners
Flat surfaces get most of our attention, but edges matter too. Over-sanding edges can round them unintentionally, while under-sanding leaves rough spots.
Sanding Different Types of Wood Surfaces
Raw, New Wood
New wood often looks smooth but still needs sanding. Light sanding:
-
Removes factory marks
-
Opens the grain
-
Prepares it for finishing
Painted or Finished Wood
Old finishes need to be dulled or removed so new coatings can stick. This usually requires starting with a coarser grit and working slowly.
Furniture and Decorative Pieces
These often have curves and details. Sanding sponges or folded sandpaper help reach tight spots without damaging the shape.
Practical Tips That Make Sanding Easier
-
Work in good lighting so scratches are visible
-
Sand a little more than you think you need to
-
Check progress by touch, not just sight
-
Take breaks to avoid rushing near the end
-
Clean the workspace often to reduce dust buildup
One surprisingly helpful trick is wiping the surface lightly with a damp cloth between sanding stages. This raises the wood fibers, allowing us to knock them down with fine sandpaper for an extra-smooth finish.

Sanding Safety Basics We Shouldn’t Ignore
Sanding creates fine dust, even when working carefully.
A few simple precautions go a long way:
-
Wear eye protection
-
Use a dust mask
-
Keep the area ventilated
-
Secure the wood so it doesn’t shift
These steps don’t slow us down — they just make the process more comfortable and safer.
Final Check Before Finishing
Before moving on to painting or staining, it helps to do a final inspection.
We should:
-
Run our hand over the surface
-
Look at it from different angles
-
Make sure there are no visible scratches
If something feels off now, it will only stand out more later.
Conclusion
Quick Summary: Sanding Wood Properly
-
Sanding is about surface preparation, not just smoothness
-
Always sand with the grain
-
Start with the right grit, then move finer step by step
-
Use light, even pressure
-
Clean dust between sanding stages
-
Avoid rushing — patience pays off
Sanding may not be the most exciting part of a project, but when we do it properly, everything else becomes easier. And once we see how much better our finished work looks, it quickly becomes a step we no longer want to skip.


