
Thinking About Drilling Into Tile? Read This Before You Start
We’ve all been there.
We want to install a towel bar. Maybe mount a small shelf. Hang a mirror in the bathroom. And then we look at that tile wall and think:
“If I drill into this, am I going to crack it?”
The short answer?
Yes, we can drill into tile without cracking it.
But only if we do it the right way.
Tile isn’t impossible to work with. It just doesn’t forgive mistakes. So let’s walk through what actually works, what causes cracks, and how we can do this safely—even if we’re beginners.
Why Tile Cracks So Easily
Before we even pick up a drill, it helps to understand what we’re dealing with.
Tile—especially ceramic and porcelain—is hard and brittle at the same time. That combination is what makes it tricky.
-
It doesn’t flex.
-
It doesn’t absorb shock.
-
It doesn’t tolerate sudden pressure.
If we rush, press too hard, or use the wrong drill bit, the tile can chip or split almost instantly.
Most cracks don’t happen because drilling is impossible. They happen because we skip preparation.

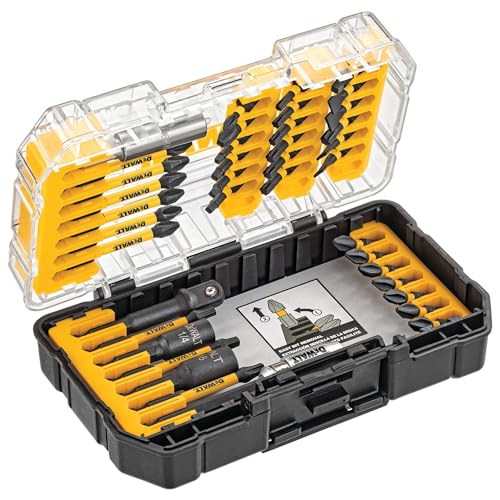
- 10 pcs of masonry drill bits with the following tip diameters: 1/8, 5/32, 3/16, 1/4 (*4), 5/16, 3/8 and 1/2.
- Performance Benefits: Features a premium, hard tungsten carbide alloy head that reduces resistance, improves precision, and provides high wear resistance.
- U-type Slot Design: allows for fast penetration and evacuation of debris as you work.
What Type of Tile Are We Drilling?
This is always the first decision. Different materials require different bit designs.
Not all tiles behave the same.
Ceramic Tile
Usually the easiest to drill. Softer than porcelain, more forgiving.
Porcelain Tile
Denser and harder. Requires a stronger drill bit and more patience.
Glass Tile
Very delicate. Needs a specialized bit and very slow drilling speed.
Natural Stone (marble, granite, slate)
Strong but prone to surface chipping if rushed.
If we’re not sure what we have, ceramic and porcelain are the most common in bathrooms and kitchens.
The Tools We Actually Need
This isn’t about fancy equipment. It’s about using the correct type of tools.
Here’s what works:
-
A drill (not impact mode)
-
A carbide-tipped masonry bit (for ceramic)
-
A diamond-tipped bit (for porcelain or glass)
-
Masking or painter’s tape
-
A level
-
A marker
-
Safety glasses
The most important rule:
Never use hammer mode on tile.
Hammer drills are great for concrete. On tile, they cause cracks almost instantly.
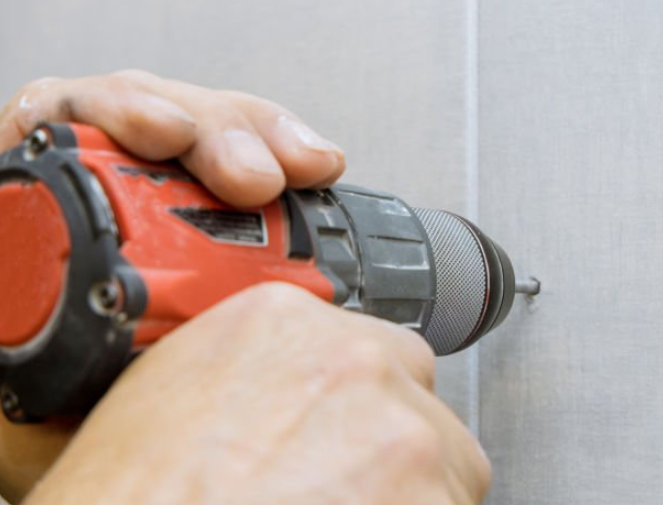
Step-by-Step: How We Drill Without Cracking Tile
Let’s break this down clearly and calmly.
1. Mark the Spot Carefully
Measure twice. Actually, measure three times.
Once we drill, there’s no undo button. Use a level if we’re installing hardware that needs to align.
2. Apply Masking Tape
Place a small piece of painter’s tape over the drilling spot.
This does two things:
-
Prevents the drill bit from sliding
-
Reduces surface chipping
It sounds simple, but it makes a big difference.
3. Start Slowly — Very Slowly
This is where most people go wrong.
We should:
-
Set the drill to regular mode (no hammer)
-
Start at the lowest speed
-
Apply light, steady pressure
Let the drill bit grind through the glaze gradually.
If we push hard, we increase the chance of cracking.
4. Keep the Bit Cool
Tile heats up quickly when drilling.
For tougher tiles like porcelain, we can:
-
Lightly spray water on the bit
-
Dip the bit in water periodically
Heat buildup is one of the hidden causes of cracks.
5. Slow Down Near the End
Once we feel the bit breaking through the tile layer, ease up even more.
Behind tile is usually:
-
Cement board
-
Drywall
-
Or mortar
After passing the tile surface, drilling becomes much easier.

Where We Should Avoid Drilling
Not all spots on tile are equal.
We should avoid:
-
Tile edges
-
Corners
-
Areas with visible cracks
-
Directly on grout lines (unless specifically intended)
Drilling too close to the edge increases the risk of splitting.
As a general rule, stay at least ¾ inch from the tile edge when possible.
Common Mistakes That Cause Tile to Crack
Let’s call these out clearly.
Using the Wrong Drill Bit
A standard wood or metal bit won’t cut it. It will slip and stress the surface.
Using Hammer Mode
This is the fastest way to ruin tile.
Applying Too Much Pressure
Tile requires patience, not force.
Skipping Tape
Without tape, the bit can skate across the glaze and chip it.
Drilling Too Fast
High speed creates friction, heat, and vibration—all enemies of tile.
What If We’re Renting?
This is where things get tricky.
If we’re in a rental, drilling into tile may violate the lease. Even if done correctly, the holes are permanent unless professionally repaired.
Before drilling, we should:
-
Check the lease agreement
-
Get written permission if needed
-
Consider alternatives
Alternatives to Drilling Into Tile
If we’re hesitant—or not allowed—there are other options.
Heavy-Duty Adhesive Hooks
Work well for lightweight items like towels or small organizers.
Suction-Mounted Accessories
Best for smooth tile surfaces.
Adhesive Mounting Strips
Some are strong enough for small shelves.
Important: Adhesive solutions work best on clean, smooth tile—not textured surfaces.
Can Cracked Tile Be Repaired?
If a crack happens, we don’t have to panic.
Hairline cracks can sometimes be disguised with:
-
Tile repair kits
-
Epoxy fillers
-
Color-matching sealants
However, full cracks often require tile replacement.
That’s why careful drilling is worth the extra five minutes.
Practical Tips to Increase Success
Let’s make this as stress-free as possible.
-
Practice on a spare tile if available.
-
Use a center punch lightly (only if experienced).
-
Drill straight—don’t angle the bit.
-
Stop immediately if you hear a sharp cracking sound.
-
Support heavier items with wall anchors behind the tile.
And remember:
Patience prevents damage. Speed causes it.
Should We Drill Into the Tile or the Grout?
This is a question we don’t always think about — but it matters.
In many cases, drilling into the grout line instead of the tile itself can be safer. Grout is softer and easier to repair if something goes wrong. If we ever need to move hardware later, patching grout is far less noticeable than replacing a cracked tile.
That said:
-
Grout doesn’t hold heavy weight as well as tile.
-
Anchors may loosen over time in grout.
-
It’s not ideal for mounting heavy shelves or mirrors.
If we’re installing something lightweight, grout can be a smart alternative. For heavier fixtures, drilling through tile into a solid anchor behind it is usually more secure.
The key is matching the mounting method to the weight of the item.
Conclusion
Can You Drill Into Tile Without Cracking It?
-
Yes, but only with the correct drill bit.
-
Never use hammer mode.
-
Start slow and apply light pressure.
-
Use masking tape to prevent slipping.
-
Keep the bit cool, especially on porcelain.
-
Avoid drilling near edges or corners.
-
Check your lease before drilling in rentals.
-
Consider adhesive alternatives when possible.
Drilling into tile isn’t impossible. It just demands attention and control.
When we slow down, use the right tools, and respect the material, we dramatically reduce the risk of cracks.
And that confidence? It makes every future DIY project feel a little less intimidating.

